Several of our methods involve reagents plated in a 12 channel reservoir plate, but there are no workable labware solutions that I can find. The only available labware close to a 12 channel plate is the Nunc 12Ch, however the dimensions are entirely wrong and there appear to be 24 positions when there should be 12.
A coworker attempted to develop a new labware class for these plates at another company, but said that he kept running into issues after several attempts at measurements. Has anyone used similar labware or come across a similar problem? And would it be better to simply fix the existing Nunc labware or to attempt to create a new class?
Thank you (also this forum is awesome, great find)
You should contact your Hamilton apps person. They should be able to provide the appropriate labware definition file given the brand name and part number of the labware.
I think once you get the correct labware definition, most of your issues will be resolved.
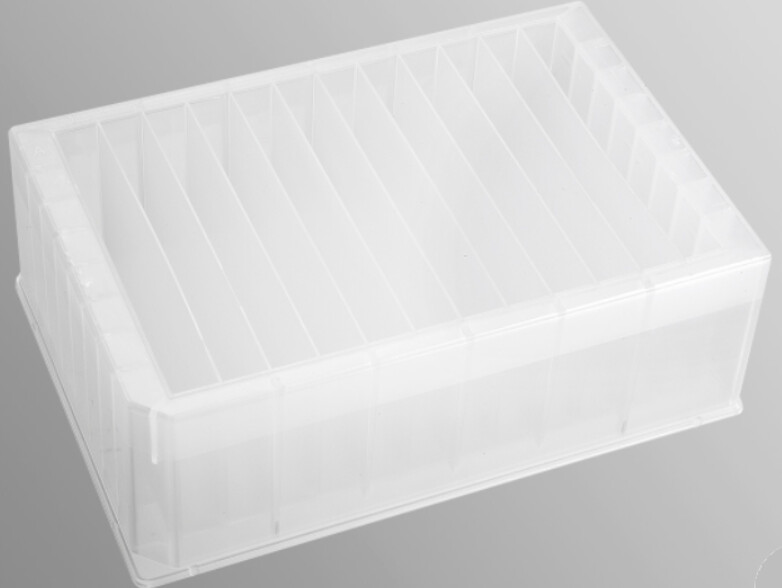
For proper definition and liquid following/volume calculation, note that this is an atypical labware definition for reagent troughs, as this trough requires individual sections that contain connected containers (within each section), while the individual sections are separated. As such, the trough is defined as a base template (.tml), with 12 individual racks (.rck) pre-snapped to the .tml, with each rack housing an individual reagent segment.
There is a current VENUS deck layout quirk regarding templates you should be aware of when using this definition. In most use cases, this trough definition will be snapped to a DWP carrier or MFX site, meaning that you will be snapping a template to another template site, as carriers are defined as .tmls as well. While VENUS will let you do this, it will error if you drag the trough .tml definition directly onto a carrier site on your deck layout. You will need to initially drag the trough completely off deck, and then drag it onto a carrier site (separate click and drags).
Ensure all the files contained in the linked zip are copied into the same folder when using, otherwise you will need to modify the definitions to link to the updated folder locations.