Sample carrier insert detection

Hi there,
We use metallic inserts to load microtubes on a 32 sample carrier.

However, if no microtube is placed in the insert, we receive a “no barcode” error, indicating that the insert is somehow recognized as a loaded item by the scanner.

Case 1: neither a tube nor an insert is placed, we receive a “no labware error”
Case 2: an empty insert is placed, we receive a “no barcode error”
Case 3: an insert with a non-barcoded microtube is placed, we receive a “no barcode error”
Case 4: an insert with a barcoded microtube is placed, we receive no error

Consequently we are not able to differentiate between case 2 and case 3. That means that we have to adjust the number of placed inserts from run to run which is not preferred.

Any ideas for a software work-around?

inserts

Cheers
Max

@max - Apologies in advance for the long reply, but the question happens to strike a few different chords regarding programming of sample loading in VENUS, and is a pretty essential topic IMO.

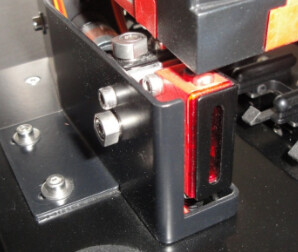
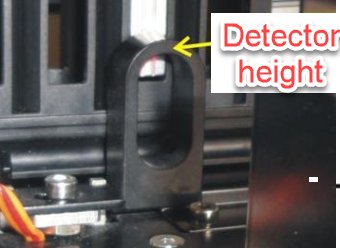
Is this STAR or VANTAGE? Labware detection during loading works differently between the two platforms. Based on the description of the issue, I would guess STAR as the autoload detects labware from a fixed height at the bottom of the carrier/tube positions.

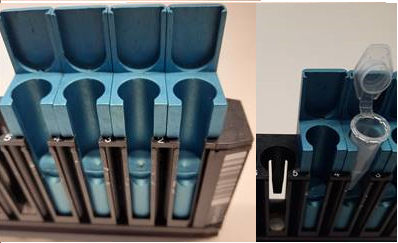
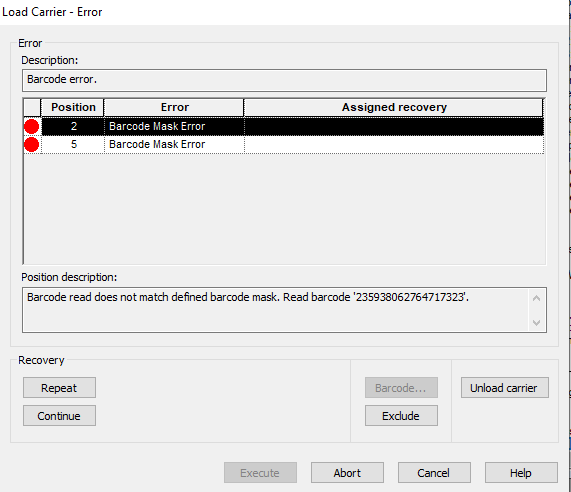
Due to the nature of these particular tube inserts, when loaded they will always block the beam used by the autoload to detect the presence of labware, so for this carrier/insert combo, labware detection is only useful if trying to detect the presence of an insert (which will not be useful for you here).

You have some additional loading options outside of labware detection that should help though, and all of the following can be applied to both STAR and VANATGE (if using VoV) systems with the same code.

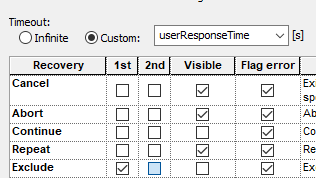
If this were me, I would program the loading of these sample carriers to only have the autoload consider a position in which a tube/sample is anticipated to present. That way there is no need to parse out errors from positions known to not have a sample.

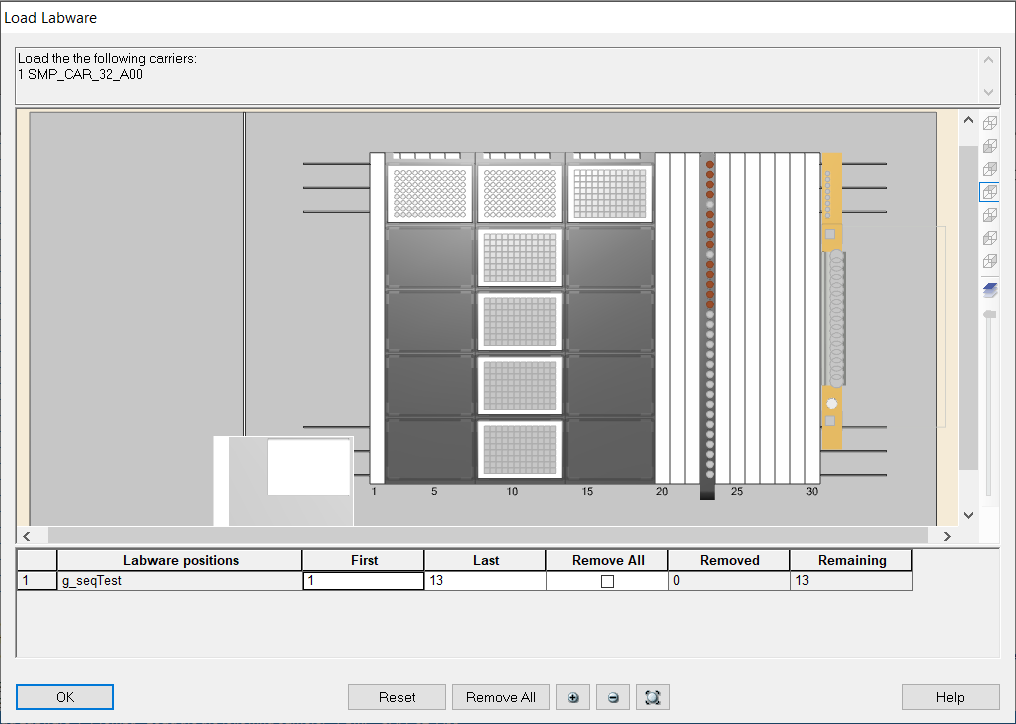
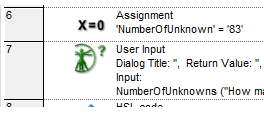
There are the two conventional approaches I would consider. Both would require preparing my sample sequence of tubes to be loaded to only contain the active positions of samples I want to load/scan. In most cases, samples in sample carriers are loaded consecutively. In this case, you can just set the end position of the sample sequence to the number of samples specified by an upstream variable assignment (usually user prompt). If this were a non-conventional scenario where sample positions could be in random or custom non-consecutive groupings, then you would need to either dynamically program a sequence based on worklist data that specifies the positions of interest, or make a custom deck sequence. In either case, the tube sequence only contains positions of interest, others can be ignored by the autoload for barcode scanning or labware detection.

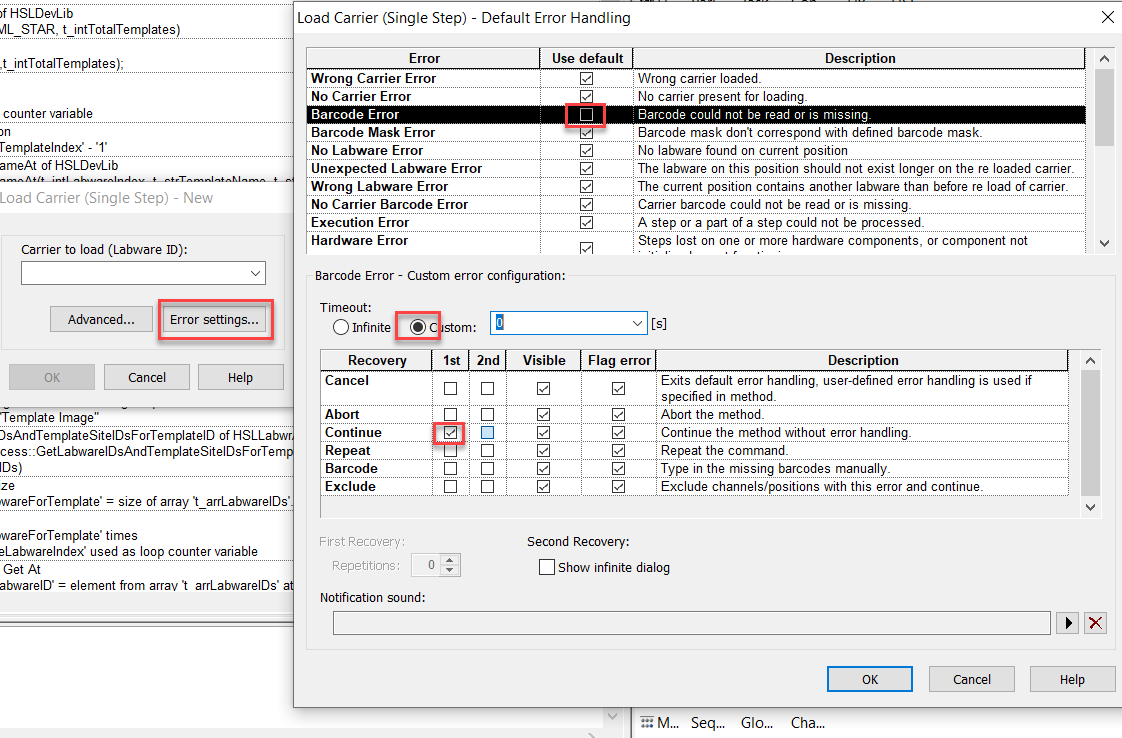
Load Smart Step using sequence of interest (easiest but no step return data):

Pass prepared sample tube sequence into the Load Smart Step. Programming done.

At runtime, user will be prompted to confirm carriers for load

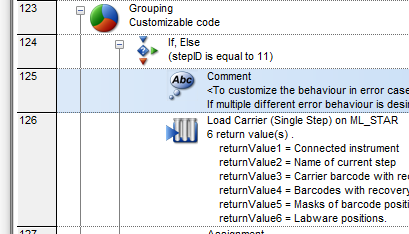
Load single steps using dynamically constructed position strings parameter (requires more programming but preserves step data from each load command):

Parse the sequence to determine each carrier (labware ID) that needs to be loaded, and the dependent position IDs to load for each carrier. Use the single steps to unload (will eliminate waiting carrier loading warning dialogs) and subsequently load each carrier, with the dynamically programmed required parameters.

image

image

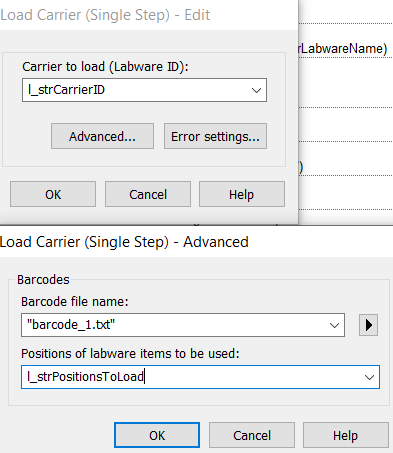
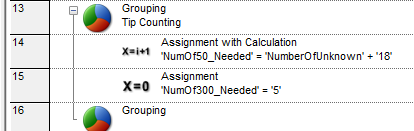
The parameter for the position string (dictates which positions the autoload will consider) needs to be constructed as a comma delimited string of the carrier position IDs you want to scan. For sample tube carriers, position IDs are typically numeric strings. I.e. if you only wanted to scan the first n number of tubes (where n <= total carrier positions):

l_strPositionsToLoad = “1,2,3,…,n”

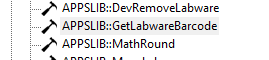
There are a number of programming options in VENUS that can be used to construct these strings. You will undoubtedly need to use the HSLSeqLib and HSLStrLib, and I also recommend the additional string library included with HSLExtensions.

After both of the above techniques, the scanned carriers will be loaded into the Vector Database, with barcode data of the scanned positions integrated into sample tracking for downstream purposes.

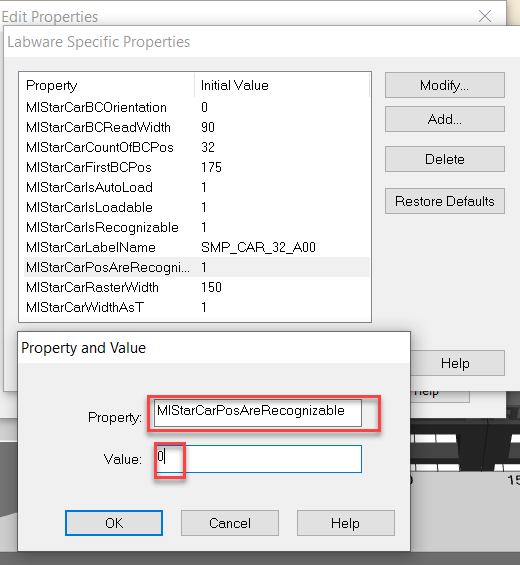
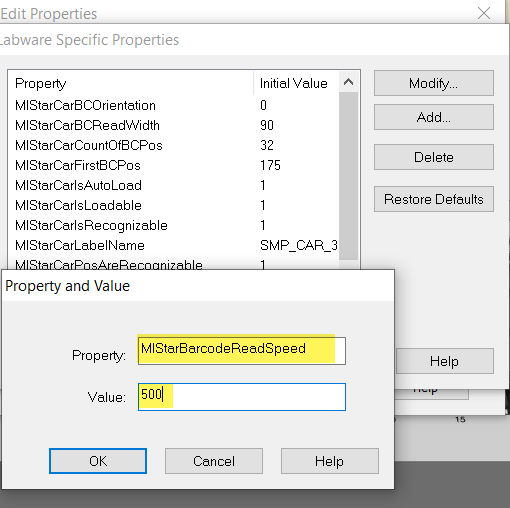
Additionally, for this particular case, I would also turn of labware detection via the sample carriers labware property, as it doesn’t work with the inserts.

Hope this helps. Let me know if you have any questions.

-Nick

4 Likes

@NickHealy_Hamilton, I appreciate your extensive reply, thank you so much! Indeed we use a STAR. I understand that the STAR measures with its laser at a specific height if there is a tube placed - meaning if the laser reaches the backside of the carrier position or not, right? Do you know the actual measurement height? Do you know if there is a software workaround to “tell” the instrument to virtually shift the expected X-value of the backside of the carrier postion by the thickness of the insert? E.g. in the carrier labware definition. Would that help?

I like your explanations regarding the loading sequences, we already use these techniques and they work fine. However I would like to implement a real random placement functionality for microtubes, which means that the actual loading positions are not known prior to the loading.
Have you implemented that before?

Cheers
Max

1 Like

@max - Unfortunately there is no workaround, programmatic or otherwise, that will influence labware detection to reconcile the difference between metal fliptube insert that has a tube or not. The tube detect sensor is mounted to a bracket at the bottom of the autoload, and has no movement control via dedicated motors.

Upon installation, the detector is aligned so that the beam makes contact at a fixed height just below the top surface of the rounded shield mounted to the far left of the autoload assembly. I don’t have the exact height off-hand, but the image to the bottom right makes it pretty clear to reference on your system. As the metal inserts occupy this space, the detector will trigger labware detection for each position an insert is located.

image image

To implement loading of randomly assorted tubes you would need to load and scan all possible carriers/positions that may contain tubes, and parse each position with the consideration that a sample may or may not be present. As you will need to modify error settings and likely need to parse step data for error codes, I recommend using single steps if you aren’t already, as you will want the step data from the load commands (easily parsed with the HSLMlStarStepReturnLib library).

Here are the two main approaches I would consider:

  • Disable labware detection and use detection of scanned barcodes to flag positions as having samples loaded. You would set automatic error recovery of ‘Barcode Error’ to Continue with immediate timeout. Then parse the sequence of all positions scanned for positions that contain barcode data, and then generate a sequence containing only those positions. Alternatively you could parse the step data as well for error codes and barcode data.

  • Treat the insert as a component of the sample tube, and load inserts and samples contemporaneously. Positions without sample tubes would not contain inserts. Use labware detection to flag positions as loaded, followed by parsing of barcodes. Parsing the error codes from the step data will allow for determining positions that contain labware but failed to be scanned, which can then be used to dynamically generate a sequence of positions to be rescanned, and then merged with the other tubes that contained barcode data.

For 32 position carriers, I also recommend slowing down the load speed of the autoload y drive from default for more robust scanning, as the read windows of that tube format are quite narrow. You will need to add a non-default labware property to the sample carriers.

Property key: MlStarBarcodeReadSpeed
Property value: ~500 (default is 1281; 128.1mm/s)

Let me know if you (or others) would like me to follow up with more detail regarding the above.

-Nick

4 Likes

Hi Nick,
again thanks a lot for your insights. Great job!
I checked the physical reading height on our instrument and recognized that one could overcome the said issue if the design of the inserts would be changed: Leaving a slot free to allow the scanner to measure through to the back of the carrier. We tested that the barcode of a loaded tube would then re recorded but an empty insert would be recognized as no labware.

However, if the barcode of the tube can not be read, the tube would be ignored at all and therefore we decided not to pursue this strategy any further.

Thank you very much for the consultation.

Can you please provide an export of the *.pkg you’re working on along with the worklist? You can message me separately with the materials. It would be helpful to review what you have defined thus far so we can provide more specific instructions.

Hi @Wish,

See below for responses regarding the issues you’re seeing:

  1. Tip Counting Issue: The problem here is you are using two different variables that are very similar in name (you can view your list of Variables by going to View > Variables in the Method Editor). This causes your User Input data to not be applied to your later calculations for tip requirements.

image
image

Additionally, you are missing an Assignment with Calculation for your 300uL Tips:

image

  1. Tip Carrier Barcode Scanning Issue: I am not entirely certain of the issue you’re experiencing here. Looking at your method, you have the Default Error Recovery set for the Load Smart Step for your tip carriers, so Continue and Exclude should be default options for your users to access. If this is not the case on your system, can you please screenshot and message me the full error window you are receiving.

  2. Sample Tube Barcode Scan Issue: Your issues are two part here. First, tube scanning was turned off in your Load Carrier Single Step. Please refer to the Help documents in that step for more info on the options for this paramter:

image

Second, your Smart Step is scanning the tubes appropriately, but the remainder of your code isn’t retrieving the barcode. Barcodes are automatically stored to the Vector Database (SQL Server by default) and need to be pulled into the method by way of a GetLabwareBarcode command, which you can find in the AppsLib:

image

You can confirm tubes are being scanned by also looking into the LogFiles folder for either a document named “barcode_1.txt” if using a Single Step or “(MethodName)_Barcodes.txt” if using a Smart Step. These documents show the barcodes read based on date/time/carrier in both Simulation and Instrument runs.

Let me know if you have any questions.

Thank you,
Dan
2 Likes

Hi Dan,

Thank you for pointing out the error for issue 1. I was able resolve it by deleting the other variable. I have not assigned the 300ul tip number as I have fixed number of 300ul tip usage in entire run and is independent of variable “NumberOf Unknowns”

I have uploaded “Issue 2 description” word document for details. I am still going over your suggestion for Issue 3.

Hi @Wish,

Thank you for uploading the additional documentation. For forum transparency, the information sought here was how to disable specific Error Recovery buttons from appearing in the default error windows that pop-up during runtime:
image

In this case specifically, disabling the Continue and Exclude options from a Load Smart Step. Steps 1 and 2 below are specific to Smarts Steps, while Steps 3 onwards apply to all Single/Gold Steps.

NOTE: changes to a Smart Step are universal to Smarts Steps across all methods on a computer.

  1. Click the Error Settings button in the Smart Step window, then select the ‘Customized error recovery’ radio button in the window the pops up

image

image

  1. In the table that enables below the radio buttons, click on the button with the ellipsis under the Go To column for the Load Carrier step. This will open a new instance of Method Editor and jump directly to the Load Carrier Single Step.
    NOTE: only make changes to this step, listed in the Customizable Code grouping.

image

  1. Open the Load Carrier Single Step and click on the Error Settings button. This will cause a new window to pop up. In this new window, click on the row for “Barcode Mask Error”. Note that the “Use Default” check box is already unchecked; this is default to Smart Steps, but not Single Steps in general, so this would need to be unchecked first by the programmer to implement customized error handling (it enables the options for the following steps).

image

  1. In the table on the bottom-half of the window, look for the column Visible and uncheck the boxes for the Continue and Exclude rows. Then click OK to close the windows to return Method Editor, save and close the new instance of Method Editor that opened, and return to the original method.

image

For additional information regarding the other options in the Error Settings window, refer to the Help file. .
Thank you,
Dan

2 Likes

Thank you Dan. I was looking at similar solution yesterday. As you mentioned that “changes to a Smart Step are universal to all Smart steps across all method”, I had same concern.

If I apply customize settings, can I anytime return back to original settings?

To return to the original settings, you would need to repeat/reverse these steps and set them back manually. If you use the Single Steps in your method instead of Smart Steps, then the modifications would be method-specific instead of universal.

Thank you for this information. regarding the 3rd issue. I changed the position of labware items to be used to “?” in order to read the barcodes of all the tubes and inserted the “GetLabwareBarcode” function below the “load carrier”. It is still not pulling out the barcodes either in text file or excel file. Also, in the trace file, it shows that it every time scanner reads only the “last tube barcode” and assigns to all the positions.

Please advise.

The GetLabwareBarcode function only returns one barcode value at a time based on wherever the current position of the sequence is set. It does not return an array of all barcodes found in that sequence.

So, you would get all the barcodes by looping over a sequence corresponding to the tubes (making sure the current position is set to wherever you want to start collecting barcodes). Then use the GetLabwareBarcode function to get the position’s barcode from the current sequence position and set the value into an array. Increment the sequence by 1 per loop iteration and loop until the sequence is consumed.

Thank you Eric. I will try this option tomorrow.

Really appreciate your help.

Hi all,

Just to follow up on this thread, Dan prepared an example method to demonstrate Load Smart vs. Single Steps, barcode comparison, etc.

Thanks!

-Eric

2 Likes